Apple Windows Migration Assistant 2.4.5.0 / 2.3.1.0 / 2.2.0.1 / 2.1.2.0 / 1.0.5.7
Apple Windows Migration Assistant can transfer your pictures, documents, and other data from a Windows PC to your Mac.
Steps:
1 - On your PC, download and install the appropriate Windows Migration Assistant from the download links above.
2 - Quit any open Windows apps.
3 - Open Windows Migration Assistant, then click Continue.
4 - Startup your Mac. Setup Assistant automatically opens the first time you turn on your Mac; if you’ve already set up your Mac, open Migration Assistant, which is in the utility folder of your Applications folder.
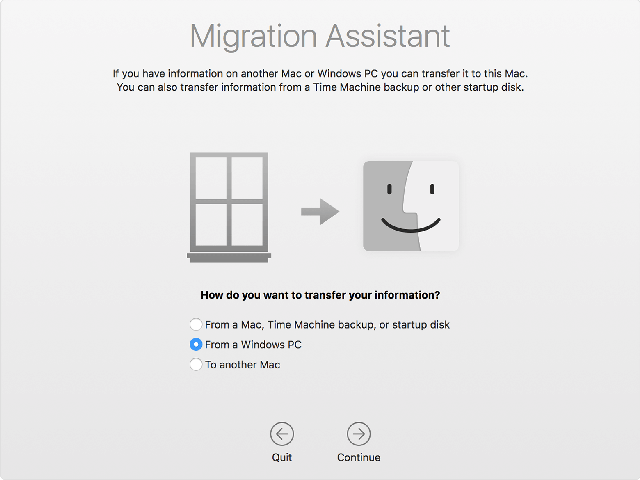
5 - On your Mac, follow the onscreen prompts until you get to the migration pane of the assistant. Select the option to transfer your information “From a Windows PC,” then click Continue.
6 - When prompted, enter an administrator name and password.
7 - Click Continue to close any other open apps.
8 - In the migration window on your Mac, select your PC from the list of available computers. Then wait for the PC to show the same passcode that your Mac shows.
9 - When both computers display the same passcode, click Continue on your PC and Mac.
10 - Your Mac scans the drives on your PC to build a list of information to migrate. When the scan completes, select the information you want to migrate to your Mac and click Continue.
You can watch the progress and estimated time remaining on both the PC and your Mac. They tell you when migration is complete.
Apple Windows Migration Assistant 2.4.5.0 / 2.3.1.0 / 2.2.0.1 / 2.1.2.0 / 1.0.5.7
Apple Windows Migration Assistant 2.4.5.0 / 2.3.1.0 / 2.2.0.1 / 2.1.2.0 / 1.0.5.7
Apple Windows Migration Assistant can transfer your pictures, documents, and other data from a Windows PC to your Mac.